Sunday, October 23, 2011

Halloween 2011


Here are the Halloween cards I made this year for my Grandkids and Great Nephew.  I used the Cheery Lynn Designs DL162 Spiderweb DieFRM123 Enchanted Flight Frame Die, C184 Judy's Blooms Die and DL151 Victorian Romance Flourish Die dies and the E165 Witching Hour XL embossing plate.  Also the small witch, bat and tree are from Cheery Lynn Designs.  On some of the cards I used the Candi brads.  To get the glitter on the Enchanted Flight frame I used 2-1/2" Scor-Tape.  The papers, ribbon and stickers were from my stash.

Birthday Card


This is a birthday card for my 14 year old Granddaughter.  I used one of the new Crafts Too embossing folders ef3052 Invitation for the background a Cheery Lynn Designs French Flair, brown pearl strips from Kaiser Crafts and a Flora Doodles flower from Petaloo.   All supplies are from SweetStamps.com

Thursday, August 25, 2011

Vase with Roses

To make this card I embossed the gray paper using the Craft's Too embossing folder #EF3045.  I stamped the SweetStamps.com Rose Vase #786 using Stormy Gray Shades Dye ink on Stardream paper and then cut it out.  I cut a slit in the top of the vase to insert the roses.  The string pearls on the oval portion of the embossing folder and the top of the vase are from Kaiser Craft.  I used a silver border sticker on the outside of the frame.  This piece was then layered to a piece of lavender paper and put on an A2 white card.  All products are from SweetStamps.com, available either on-line at their web site or at their retail store in Fowlerville, MI.

March Walk in Workshop 2011

Die cut the brown, blue, green and white cardstock using the four largest scalloped rectangles from the nesting dies.  Stamp the basket on the white layer using black ink and color with markers.  Layer the scalloped rectangles together and layer to front of card.  Use a glue pen to adhere the glitter to the center of the flowers.

Supplies;
Cheery Lynn Designs Rectangle Scalloped Card Maker's Stacker's Nesting Dies-ST015
Great Impressions stamp-G404 Wicker Daisy Basket
Tombow Markers-491, 062, 133, 942
SweetStamps.com-Nightfall Shades Dye ink, Sparkly Sweet Glitter and Quickie Glue pen
Cardstock-A2 white card, Brown 5 1/2" x 4", Blue 5" x 3 1/2", Green 4 1/2" x 3", White 4" x 2 1/2"


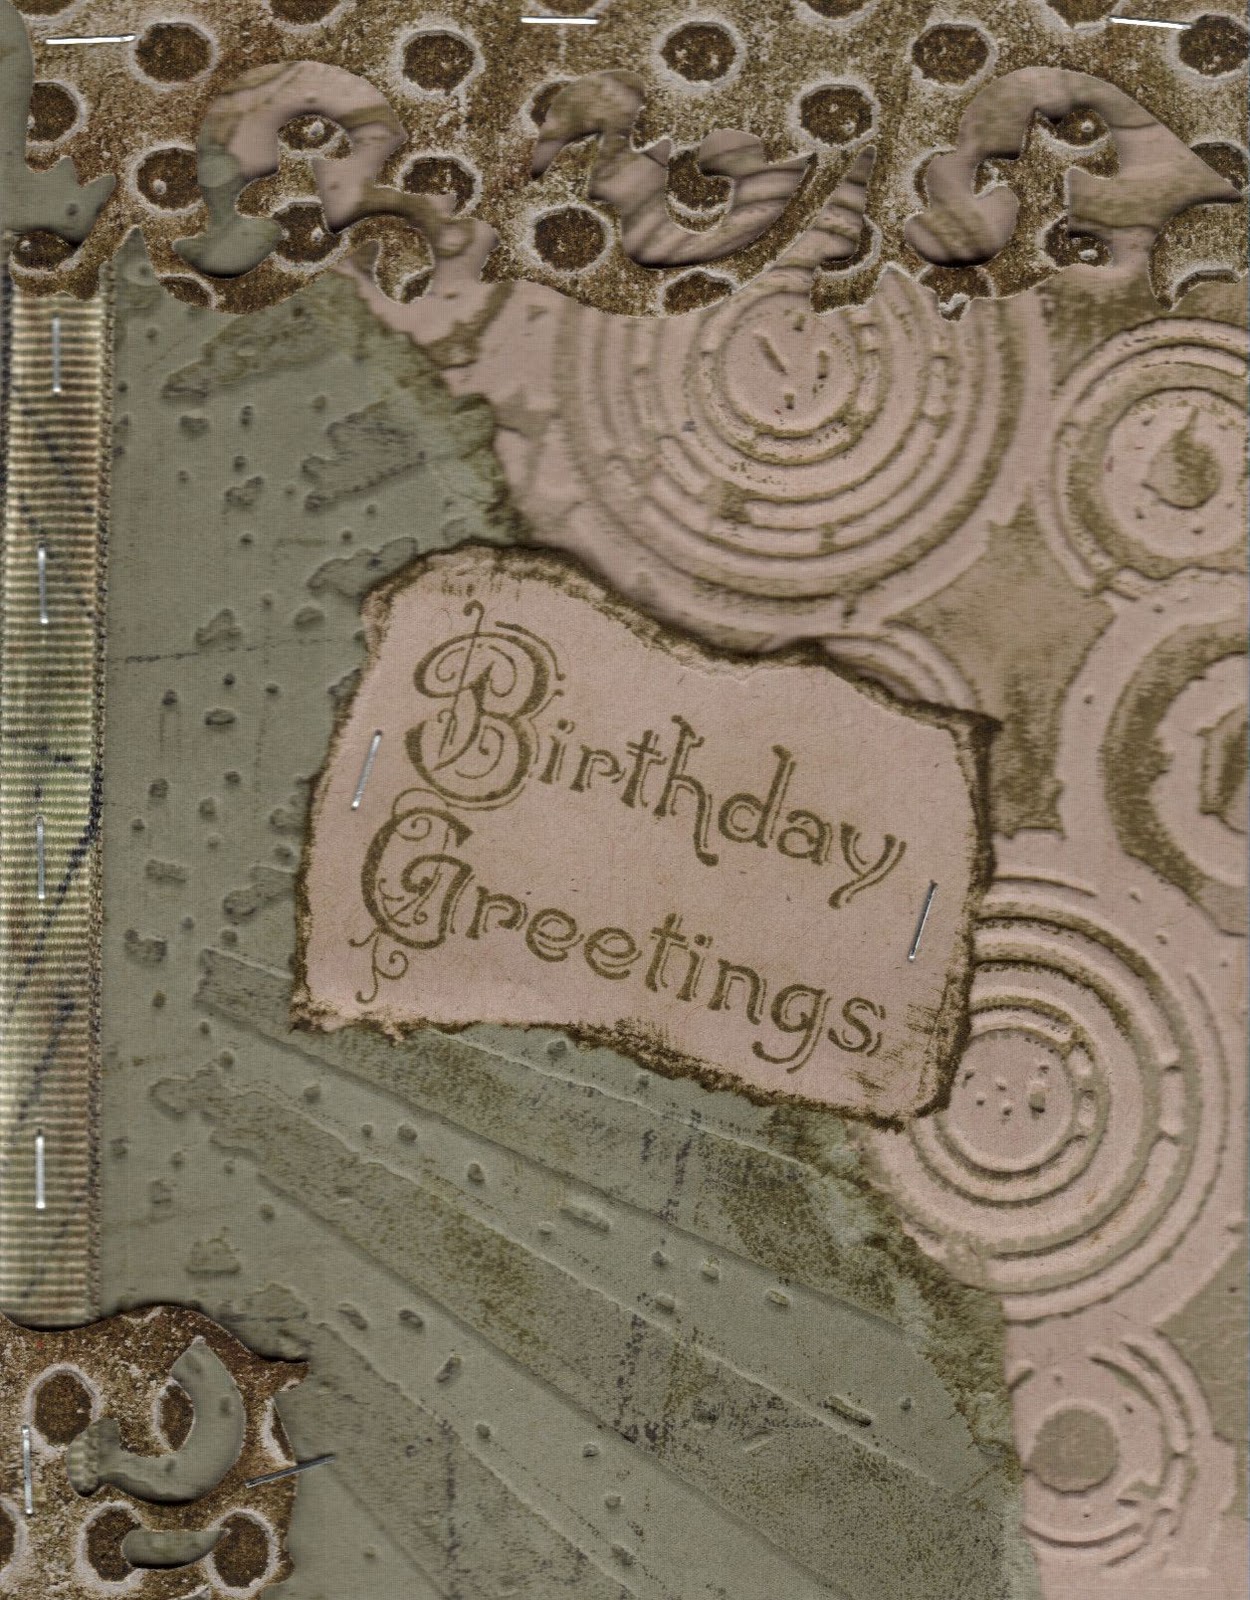
Stamp the Scroll and Leaf background on the bottom half of the brown cardstock using Aquamarine ink and emboss the top half with the embossing folder. Round the corners using a corner rounder and attach
the ribbon by taping the tails to the back side of the brown layer.  Layer to an A2 cream card and round corners of card.  Stamp birds on blue cardstock using black ink and color with markers.  Round corners of blue layer and cream layer, use a hole punch to make holes through both layers and attach the brads.  Layer to card.  Stamp words in Aquamarine ink on cream cardstock, round the corners.  Layer to the blue cardstock and round corners.  Use foam dot to attach to the card.      

Supplies:
Great Impressions K86 Scroll & Leaf Background and B207 Sweet Bird
Crafts Too Embossing Folder-Dots #3014
Tombow Markers 491, 055, 942
Cardstock-A2 Cream card, Brown 5" x 4", Blue 3 1/2" x 1 1/2" and 1 1/2" x 1 1/2", 
Cream 3 3/4" x 1 3/4" and 1 1/4" x 1 1/4"
Ribbon-Beaux Regards Gwendolyn
Corner rounder, metal brads and foam dots


Stamp front of card using background stamp and Tank ink.  Trim off 1 1/2" from right side of front of card.  Stamp daisy border on white cardstock and color with markers, layer to green cardstock.  Layer this piece to the right inside flap of card.  Stamp girl on white cardstock and color with markers, layer to green and yellow cardstock.  Layer to front side of card, overlapping the daisy border as shown.  Use glue pen and apply glitter to center of flowers and buttons on dress.

Supplies:
Great Impressions-K86 Scroll & Leaf Background, G403 Daisy Border and F466 Little Girl in Springtime
Tombow Markers-850, 942, 977, 491, 062, 025 and 126
Cardstock-A2 White card, Green 5 1/2" x 1 1/2" and 2 3/4" x 2 3/4", Yellow 3" x 3"
White 5 1/4" x 1 1/4" and 2 1/2" x 2 1/2"  

Stamp Daisy using black ink on a piece of white cardstock, color with markers and cut out daisy.  Stamp Daisy in black ink three times on white cardstock.  Layer to black cardstock and white cardstock.  Attach ribbon to white layer by taping the tails to the back, layer this to black layer as shown in sample.  Use foam dot on colored daisy and attach to the center daisy on card.  Layer to white card.

Supplies:
SweetStamps.com-Nightfall Shades Dye ink and foam dots
Great Impressions-E702 Daisy Flourish
Ribbon-May Crafts Black Diamonds
Tombow Markers-055, 025, 942 and 977

Stamp butterflies on vellum with black ink and emboss with clear EP. Color butterflies with glitter pens. Edge vellum with leafing pen and set aside to dry.  On glossy cardstock apply colored inks by swiping the pads directly on the cardstock.  Layer the glossy cardstock to blue layer using clear photo corners.  Slide the vellum into the photo corners on top of glossy cardstock.  Layer blue layer to fuschia layer and attach to left side of black cardstock as shown above.  Emboss the ribbon using the embossing folder and  layer to card as shown.  Tie thin ribbons in knot and use glue dot to attach to card.  Apply pearl to ribbon.  Layer on a white card.

Supplies:
SweetStamps.com-Shades Dye Inks Aquamarine, Nassau Blue, Fuschia Fizz & Sunrise Orchid, Detail Clear embossing powder, Spica glitter pens Sky Blue & PinkClear Photo Corners, 36# Vellum, Pearls
Crafts Too embossing folder-Spot & Dots #3024, Mini Glue dots
Great Impressions-G405 Butterfly Flourish
Cardstock-A2 White card, Black 5 1/2" x 4 1/4", Aqua 2 3/4" x 3 3/4", Fuschia 3" x 4"
Ribbon-1/8" and 5/8" Aqua and Fuschia (Walmart)
Silver Leafing pen

Thursday, April 21, 2011

Easter 2011

These are the Easter cards I made for my family.  The cards were made using Starform stickers that were colored with Starform markers.
The stamps are from SweetStamps.com.  I used Scalloped Overlays from Paper Cut and dies from Cheery Lynn Designs for the Scalloped and Coved rectangles.  The Dots embossing folder is from Crafts Too.


Sunday, April 3, 2011

Girl with Bunny

For this card I used a 4 1/4" x 11 piece of white cardstock.  I used a score-it board and scored it 4 1/2" in from one end and 1 1/2" in on the opposite end (This piece will form the flap on the card).  I used embossing folders from Craft's Too and embossed the 4 1/2" section using the Small Flowers #3022 and the  1 1/2" section using the Dots 5x5 #3014.  I attached the 7/8" turquoise satin ribbon over the right side of the card and the 1/8" ribbon to the edge of the dotted flap. I cut the three Coved Rectangles from the Cheery Lynn design Little Stackers LST007.  I used Memento Tuxedo Black ink to stamp the Girl with Bunny stamp from SweetStamps.com and colored her in using Copic markers (B00, B02, BG01, E000, E23, E30, E31, E34 & R20).  I layered the Coved Rectangles to the card leaving the bottom portion free of adhesive so the lower flap could be tucked under.  The flower is made from some petals I had in my stash of things held together with a pearl brad from American Crafts Elements.

Challenges
SweetStamps-Easter

Lattice, Flowers and Butterflies


All of these cards were made using the Lattice 2 Window Frame die (FRM 115) from Cheery Lynn Designs and various dies from Marianne design, Nellie's Multi Frames and Joy Crafts.  I really love the Lattice die as you can create so many different looks from it.  Up front you may think of it as an expensive die ($24.95) but by removing sections or filling in the squares you can get a variety of effects (this is one die I have really got my moneys worth from).  Micro glue dots really come in handy when using this die, they are just tiny enough to fit behind the lattice for layering.  (Hint: save the small pieces from cutting the lattice out to use in creating different designs with the lattice).

For this card I die cut the Lattice from cream paper, trimmed out a small square section, used Micro Glue dots to attache a piece of tan cardstock to the back side of the lattice.  I used Brownie Shades Dye Ink and stamped A Cheery Hello from SweetStamps.com.  The vine (LR0151) and flowers (LR0106) are from Marianne design.  I die cut the flowers from cream and yellow papers, highlighted the petals with Honey and Dandelion Shades Dye inks and layered the petals together with micro glue dots.  I used the micro glue dots to attache the lattice to a cream & brown polka dot paper then added the vine and flowers. For the center of the flowers I used Bisque Liquid Pearls.

For this card I die cut the Lattice from brown cardstock, trimmed out a section, used micro glue dots and layered it to a turquoise paper.  I stamped Butterfly Kisses from SweetStamps.com in Aquamarine Shades Dye ink.  I die cut the vine (LR0150) from Marianne design and used Palm Grove Shades Dye ink to add some shading.  The die cut butterflies (60020027) are from Joy Crafts, I used Platinum Liquid Pearls to add some highlights to the butterflies.


For this card I cut the lattice from brown cardstock.  Using micro glue dots I attached the green ribbon behind the lattice.  I stamped Smile from SweetStamps.com using Distress Embossing ink and Detail White EP on the brown piece I die cut from a Nellie's Oval 3 multi frame (MFD013) and attached it to the card using a 1/8" piece of white ribbon.  Then I layered the lattice to an A2 white card. The roses are cut from a Marianne design Rosebud Maker die (LR0145).  I used two shades of pink and white cardstock to make the flowers (directions are on the package) and assembled using ultimate glue.  I layered the vine and roses to the card and added White Opal Liquid Pearls to the center of the roses.


For this card I cut the lattice from dark pink cardstock.  I cut out a square section and using micro glue dots layered the lattice to an A2 white card.  I cut a piece of brown cardstock to fit in the square and attached it to the card.  For the brown triangles in the corners I used left over pieces from the previous card and layered in the corners.  The pink, brown and white petals for the flower were cut from a Nellies Dot Circle multi frame die (MFD025) and the center highlighted with White Opal liquid pearls.  The largest white flower was one I had in my stash of things to use.  The ribbon is 7/8" sheer white I bought at Walmart.


For this card I cut the lattice from white cardstock.  The diamonds were die cut from Nellie's multi frame Diamond MFD021 and the flowers from Nellie's Hexagon MFD026.  I layered the diamond and flower pieces together and added Rouge liquid pearls to the center of the flower.  The small brown piece is die cut from the small piece in the Diamond set.  I used 1/8" white ribbon to attach this to the lattice before layering the lattice to an A2 white card.  This is where saving all the little pieces that you get when you cut the lattice die comes in.  I used the pink and brown pieces to fill in the spaces in the lattice before layering the diamond/flower layer to the card.

Saturday, March 26, 2011

Flowers and Pearls


I made all of these cards using Spring Journal Cards DP from g.c.d studios-Spring in Bloom (this paper is 12x12 double sided and has 6 different panels on each side), Joy Crafts Embossed Glitter Stickers (Cats/Flowers Mauve) and self adhesive pearls strips from Kaiser Craft.


For this card I used oval dies from Cheery Lynn Designs and  Nellie's and Latte pearl strip from Kaiser Craft.


For this card I used a Circle Window card from The Paper Cut, White pearl strip and a single snow pearl from Kaiser Craft, a self adhesive flower (Say It With Studs) from Prima Marketing and Scalloped Little Stacker dies from Cheery Lynn Designs (the circles are cut off center and layered to the outside of the card)  The rose sticker in the center is on the inside of the card, layered to two scalloped circles.


For this card I used the Scalloped Little Stackers from Cheery Lynn Designs and added ribbon and buttons.


For this card I used the XL Oval dies from Cheery Lynn Designs to make the oval frame.  The pearls strips are Champagne.  The roses on the top of the oval were cut out from one of the DP panels.  I  layered the two outside roses directly to the paper, used a 1/16" foam dot to layer the next two roses and a 1/8" foam dot to add the middle rose to the card.


For this card I used the Coved Rectangle Little Stacker dies from Cheery Lynn Designs and outlined the two gray layers using a silver leafing pen.  I used a tower card, added ribbon and a single snow pearl from Kaiser craft.

Flowers in Bloom


Here's a card I created using Cheery Lynn Designs and Nellie's dies, ribbon, self adhesive pearl stripes from Kaiser Craft and a stamp from Hero Arts.  The flower was made by layering 6 flowers together and adding a Butterfly brad from Kaiser Craft.  The butterfly is a sticker that I highlighted with Liquid Pearls.

Tuesday, March 15, 2011

Distressed Birthday


I needed a birthday card for my son and thought I would do some distressing and came up with these two cards. They turned out just the way I pictured them before I started.  I used Tim Holtz Distress inks (Black Soot, Forest Moss, Brushed Corduroy, Bundled Sage and Pumice Stone), grunge board, Tiny Attacher, Scrollwork die and Texture Fades embossing folders.  The Birthday Greetings stamp is from SweetStamps.com.  I started by inking the folders with the Distress inks and embossing the tan and green papers.  I tore the green paper, inked the edge and layered it to the brown layer.  I cut the grunge board and applied the ink directly to it before using the Tiny Attacher to layer it to the card.  The ribbon was 3/8" cream grosgrain that I applied the inks to than used the Tiny Attacher to layer it on the card. Birthday Greetings was stamped in Forest Moss on the tan paper, torn around the edges, inked with Forest Moss ink and attached using the Tiny Attacher.

Sunday, March 13, 2011

Welcome Spring

For this card I started with a brown circle card from The Paper Cut and layered it with one of their pink scalloped circles which was outlined with a gold leafing pen.  I used green and pink pattered paper and die cut the circles and green flower shape using Nellie's Multi Frame Dots Circle die.  The Three Wild Rose Bunch from SweetStamps.com was stamped on Solar White paper using Memento Tuxedo Black ink and colored with Copic markers before cutting it out.  Highlight center of flowers using Gold Spica pen.  Welcome Spring from SweetStamps.com was stamped using Distress Embossing ink and embossed with Queen's Gold EP and a gold leafing pen was used to outline the shape.  The butterfly is a paper charm from Amy's Magic, Inc. and is attached so the wings are raised off the card.  I used foam dots to layer the flowers to the card and micro glue dots to attach the tiny pink buttons.

SweetStamps.com Think Spring

Lyle


I've always loved Lyle from SweetStamps.com, so I decided to use him to make a birthday card for my husband for his 60th birthday.  I used a cream square card and layered it with brown paper.  Using the Spots and Dots embossing folder from Crafts Too, I embossed the blue/gray paper and layered it to the card.  I used Beckett Expression Candlelight paper and cut out a Coved Rectangle using the Little Stackers dies from Cheery Lynn Designs, stamped Lyle with Memento Tuxedo Black ink and colored him with Copic markers.  I cut a larger Coved Rectangle from brown paper and layered this behind Lyle. The striped paper is from Kaiser Craft, I used this behind the Coved Rectangle then layered it to the card using foam dots.  The long stripe is layered to a lighter brown paper.  The clips, buckle and brads are all from the Hodgepodge Hardware set from Stampin' Up.  I slid the buckle on the cream ribbon, threaded the ribbon through the clips and used the Tim Holtz Tiny Attacher to attach the ribbon to the clips before using the brads to layer the clips to the striped paper and layering it to the card.  I used Copic markers to color a piece of white ribbon, trimmed the ends and wove the ribbon through the buckle.

Challenge:
SweetStamps Olden Days or Vintage

Sunday, March 6, 2011

Duck and Chicks


I made this card using some of the stamps from the March Stamp of the Month program from Great Impressions stamps.

Saturday, March 5, 2011

Sunflowers

Stamp sunflowers using black ink, color with Copic markers and cut out.  Stamp sentiment on 
front of card using Brownie ink and emboss with embossing folder.  Die cut circle and rectangle.  
Layer strip of paper, circle and rectangle to card. Use foam dots to attach sunflowers. 

Stamps: All images from SweetStamps.com
Inks: Brownie (Shades Dye ink) Tuxedo Black 
(Memento) and Copic markers
Dies: Cheery Lynn Designs
Embossing folder (Cuttlebug)
Papers: Brown (Bazzill) and Patterned (Kaiser Craft)

1900's Lady


This card was made for Sweet Stamps - Sketch Challenge
Please visit the Sweet Stamps Blog and enter the challenge for chance to win 
$20 shopping spree in the store!! 


I made this card for the sketch challenge at SweetStamps blog.  Using Beckett Expression Candlelight paper, I die cut a scalloped oval from Cheery Lynn Designs Little Stackers.  Then I stamped the 1900's Lady from SweetStamps.com on the oval using Memento Tuxedo Black ink and colored her with Copic Markers.  I sponged the background with Sand Castle Shades Dye ink from SweetStamps.com. I cut a second scalloped oval using the Little Stackers Scallop Oval and the Oval Little Stacker dies and layered this over the oval that I colored.  I used various papers from Kaiser Craft, the pearls were made using Liquid Pearls and the flowers were from Boutique Fleur.

Challenges:
Shelly's Images Layers, Layers, Layers
Simply Create Power of Flowers
Cute Card Thursday Signs of Spring
Bunny Zoe Crafts-flowers

Wednesday, February 23, 2011

Happy Birthday Roses

I made this card for the Flowers challenge at SweetStamps.com.  I used Elegant Happy Birthday # 997 and Rose Surround Small # 7073 from SweetStamps.com .   I stamped the roses on 36# vellum using white dye ink and embossed them with Queen's Gold EP.  I cut them out using a 4 split tool and a piercing pad.  The coloring was done on the backside using a blender pen and Shades Dye inks- Tank, Forest, Sunrise Orchid and Fushia Fizz.  The background was done using a pouncer and Palm Grove-Shades Dye ink.  I die cut the oval using Cheery Lynn Design's Little Stackers Oval and outlined it with a gold leafing pen.  I used clear photo corners to layer the white cardstock to the green card.  The roses were attached using the red Tombow glue stick.

Monday, February 14, 2011

More Valentines


Emboss a 3"x 5 1/2" piece of red and aqua cardstock using SweetStamps.com new embossing plate.  Rub white dye ink directly to the red paper to highlight the embossing.  Layer both pieces to a 5 3/4"x 5 3/4" dark brown square and layer this to a square card.  Die cut the hearts for both the front and inside of card in red, aqua and dark brown cardstock.  Emboss the hearts using the Dots embossing folder and SweetStamps embossing plate.  Stamp Country Hearts and Heart Patches on red cardstock using embossing ink and detail white embossing powder.  Cut the hearts out.  Attach striped ribbon to the front of the card and layer hearts to card as shown using foam dots to attach the Country hearts.  Arrange three hearts inside the card and stamp Be Mine in center heart using embossing ink and emboss with detail white EP.

Products used:

SweetStamps.com Stamps-Be Mine #993, Country Hearts Patch Large 110, Heart Patches # 108, White Detail EP, White Dye ink
Nellie's Multi Frame's Heart #MFD022
Crafts Too Embossing folder Dots #3014
Distress Embossing ink
American Crafts-striped ribbon
foam dots


Emboss red, aqua and dark brown cardstock using SweetStamps.com new embossing plate.  Rub
white ink directly to the paper to highlight the embossing.  Tear paper into pieces and randomly glue to the front of a white note card.  Attach ribbon to center of card.  Die cut hearts from red, aqua and dark brown paper and emboss using Dots embossing folder and SweetStamps.com embossing plate.  Rub white ink on aqua heart to highlight embossing.  Layers hearts together and layer o card using foam dots.  Using micro glue dots attach the metal heart to front of card.  For the inside of the card use the cut outs from the die cuts as a stencil and ink hearts using Valentine, Montego Bay and French Roast ink applying with a sponge.  Stamp Be My Valentine in center heart using French Roast ink.

Products used:

SweetStamps.com Stamps-Be My Valentine, Shades Dye inks- Valentine, Montego Bay and French Roast, White Dye ink
Nellies Multi Frame's-Heart #MFD022
American Crafts-ribbon
Gary Burlin-Krystal Klear Hardware heart
Micro glue dots and foam dots


Start with a 5 3/4" x 5 3/4" square card.  Cut a piece of gold mirror cardstock the same size as the card and attach to the front.  Using the Nellie's die, cut the corner pieces from gold mirror cardstock and Stardreams textweight paper, layer the pieces together and adhere to the bottom corners of the card.  Emboss the hearts for the front of the card using the Trendy Ornament Hearts stencil from the gold mirror cardstock and Stardreams textweight paper.  Cut out and layer to the card using foam dots between the large heart and the card and between the hearts.  Apply the pearl stud to the center of the heart.  For the inside, die cut the hearts from the Nellie's heart die, layer together and stamp Be My Valentine in center using embossing ink and Medieval Metals EB.  Layer to inside of card.

Products used:

SweetStamps.com-Stamp-Be My Valentine, Medieval Metals EP, Distress embossing Ink
Nellies Multi Frame's Heart #MFD022 Nellie's D Die #DD011
Ecstasy Crafts-Trendy Ornament Hearts
Prima Marketing-Say it with Studs #530983
The Paper Cut-Gold Mirror cardstock, Stardreams textweight paper, square card
Foam dots


This card was done the same as the Gold card above but all papers were Stardreams textweight.


Start with a piece of 4 1/4" x 5 1/2" dotted paper.  Layer to the front of an A2 white card.  Die cut the hearts from Ice Silver Stardream textweight paper and Bo Bunny Love Hearts paper, using the Nellie's Heart die.  Layer hearts together and add a glitter heart to center.  Die cut the swirl using the Stardreams paper the Marianne's die.  Use foam dots to attach the heart layer to the front of the card and micro glue dots to attach the swirl.  From a 2" x 5 1/2" piece of the Stardreams paper die cut the border using the Nellie's border die.  Cut one side first, then line up the die for the second cut by placing the die close to the first cut to form scallops on each side of the border.  Attach border to bottom of card, letting it hang slightly over the edge of the card.  Apply Liquid Pearls to the center of the scallops.  For the inside, use the cut out from the Stardreams paper heart as a stencil and using a sponge apply Fuschia Fizz ink to the heart.  Stamp SweetStamps.com Happy Valentine's Day in  center of heart in Fuschia Fizz ink.

Products used:

SweetStamps.com-Stamp Happy Valentine's Day #952, Fuschia Fizz Shades Dye ink
Nellies Multi Frame's Hearts #MFD022 and Borders #MFD023
Marianne's Design #LR0112
The Paper Cut-A2 card, Iced Silver textweight Stardreams paper
Bo Bunny-Love Hearts and dotted paper
Liquid Pearls-Flamingo
foam dots and micro glue dots


Using removable tape line up the Trendy Ornament Heart stencil on a 4 3/4"x 4 3/4" piece of white cardstock.  Use chalk to color in the flowers and vines and a fine black multiliner for the dots.  Carefully chalk heart in center.  Layer the stenciled card to a 5 1/4" X 5 1/4" piece of red cardstock using clear photo corners.  Attach ribbon to the bottom corners of the card, taping the tails in the back.  Layer the red card to the front of a square white card of the same size.  Stamp Happy Valentine's Day in Fuschia Fizz ink in the center of the heart.

Products used:

SweetStamps.com Happy Valentine's Day #952   Fuschia Fizz Shades Dye ink
Ecstasy Crafts-Trendy Ornament Hearts #4253023
The Paper Cut-square card
Copic Multiliner 0.3
Chalk, ribbon